
There are many advantages to do Boot into TWRP Recovery. Maybe, you are just aware with the boot into TWRP recovery for rooting the android phone. But there are many other pros to boot into TWRP recovery mode.
Here are the 3 things you can do with Boot in the TWRP Recovery:
- You can do System Updates.
- Factory Reset Your Android Phone.
- You can clear your Phone’s cache.
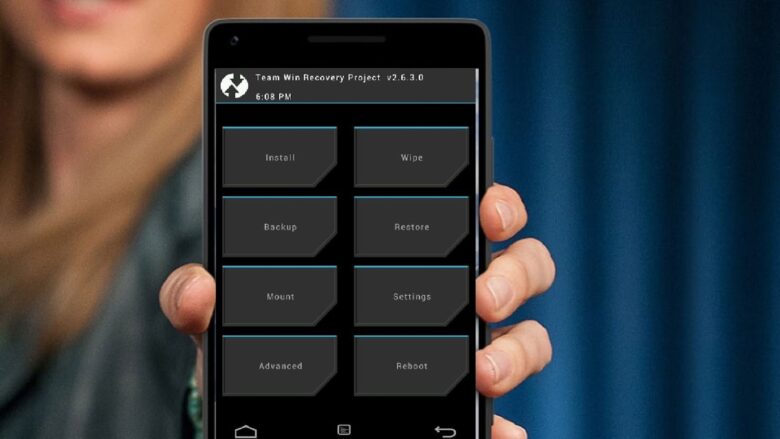
How to Boot into Custom Recovery (TWRP)
There are three different methods to boot into Custom Recovery. We will get into each method Step By Step.
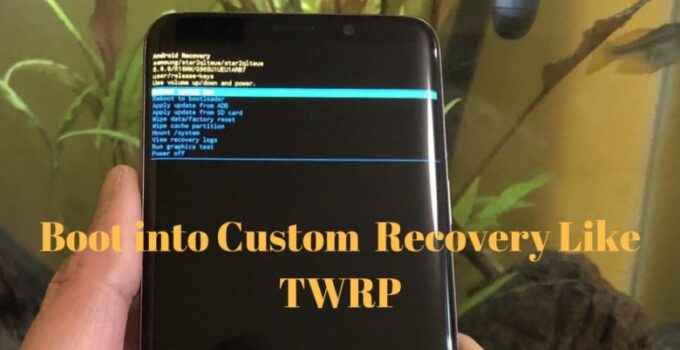
Method 1: Boot into TWRP Using Power Button
Step#1: First of all, turn off or Power off your Android phone.
Step#2: You can simply do by keeping pressing the “Power Button + Volume Down”. In some phones, you have to keep pressing the “Power Button + Volume Up”.
Step#3: Congrats! You have Done!
Boot into Custom Recovery Still not working? Choose your phone model and now use these keys to boot.
Keep Pressing the “Power Button + Volume Up + Home Button”. (Make sure you have powered off your phone before pressing these button).[/su_box]
Keep Pressing the “Power Button + Volume Down” until the LG logo appears. (Make sure you have power off your phone before pressing these button).[/su_box] [“For HTC: The way to boot into HTC is little different. If the above way works on your phone, That’s Great! Otherwise, follow these few points:[/su_box]
- Go to Settings in Your HTC Phone.
- Open the Battery Option.
- Uncheck FastBoot.
- Now, Power Off the Your HTC phone.
- Keep pressing the “Power Button + Volume Down” for few seconds.
- Keep holding the Volume Down Button and release the Power
- Now you are in the Bootloader. Use the Volume button to go up and down.
- Use Power Button to enter into TWRP Recovery or Custom Recovery.
- That’s All!
- Keep Pressing the “Volume Up + Volume Down + Home Button”. You will enter into the Bootloader.
- Now use volume up and volume down button to navigate to the custom recovery option. Select the Custom recovery by using the power button option.
Method 2: Boot into Custom Recovery Using Quick Boot
Quick Boot is an android based application that is used to boot into TWRP Recovery or custom recovery. An important point here is, it requires that your phone should be rooted. If your phone is not rooted then you cannot use this method.
Do you want to root your phone in one click here:
Recommended: How to Root Android Phone in a Single Click Step by Step
Read the above article, once you have done with rooting the android phone, then you can go for installing the Quick Boot app on your phone.
Install this app on your phone, you can download Quick boot app from the play store too.
Method 3: How to Boot into TWRP or CWM
Here we are going to introduce you to another method that does not require rooting the android phone. AH! That’s a good point, you don’t need to ROOT your phone for this method.
Here are the few steps, you need to follow. Please follow each step carefully.
Step 1: Enable USB Debugging on your Android Phone
Point No.1: Attach your phone with a Laptop or Computer using DataCable of your phone.
Point No.2: Now, you have to enable the USB debugging on your android phone. Don’t know how to do this? Here are a few points you need to follow.
- Go to Settings in your Phone.
- Tab on the Developer Options.
- In the developer options, tick on the USB Debugging as shown in the image below.
Important: In some phones, maybe you cannot see the developer options. So don’t worry, you can show this developer options by using the following method:
- Go to Settings > About Device
- In the About Device go to => Build Number
- Tap on Build Number options many times.
- It will show that Developer options have enabled.
- Go Back in the Settings again, you will see the developer options there.
- Just go to Developer options and enable USB debugging.
Once you have enabled the USB Debugging, its time to install ADB and Fastboot on your Windows.
Recommended: How to Install ADB & FastBoot on Windows
We hope that you have installed the ADB and Fastboot using the above link. Now, type the below commands after installing the ADB:
adb reboot recovery
Press Enter, your phone will get into the Custom Recovery or TWRP recovery after rebooting. Congratulations!
Final Verdict About Booting Android Phone into TWRP Recovery
Boot the Android phone in the Recovery option is necessary when you are rooting your Android phone. I hope that you have successfully boot your phone into TWRP Recovery mode or CWM recovery using the above methods.
If you have still confusion or problem, most welcome. Just ask any question without hesitation. We will reply you as quickly as we can.


