
In this post, you are going to know how to install Zedge tonesync in Windows 7, 8.1, 10, 11, Mac, Linux, and Ubuntu means the full guide you will have.
In the first steps, you will know for Windows that’s is most of the audience requests.
What Is Zedge Tonesync
Zedge Tonesync is a desktop application that allows users to synchronize their phone’s ringtones and notification sounds with their computer.
With Zedge Tonesync, users can browse and download a variety of ringtones, notification sounds, and wallpapers from the Zedge website, and then transfer them to their phone via USB or Bluetooth.
The application is available for Windows and Mac computers, as well as for Linux and Ubuntu operating systems.
Zedge Tonesync is a convenient way for users to personalize their phone’s sounds and visuals without having to manually transfer files between their phone and computer.
How To Install Zedge tonesync Windows 7, 8.1, 10, 11?
Let’s get started!
Method #1
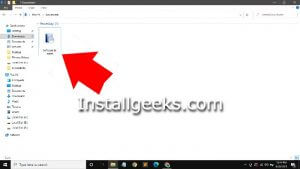
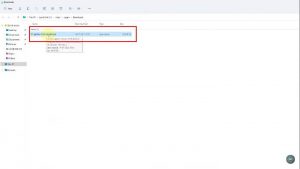
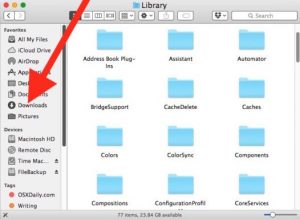
- You can install it by this method, after downloading Zedge tonesync you will find the file in .exe format on your computer in folder C:\Users\YourUserName\Downloads.
- Double-click to start the installation.
- If you are using Zedge tonesync for testing purposes, we recommend starting it manually.
- By default, the Zedge tonesync will install as a service and start with Windows.
Method #2 Windows 7
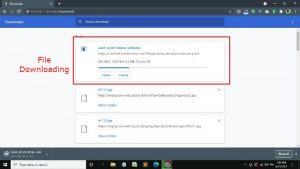
- Download the installation file.
- Start the installation and double-click the downloaded download file. This will start the installation process.
- Select the items that need to be installed and click Next.
- You can also add Zedge tonesync source code to the installation.
- Set whether you want Zedge tonesync to start manually or by boot.
- You can configure and restart the server when you want, but Zedge tonesync will start every time the machine restarts.
- You can also configure what port to use. Make sure this port is open to external access before proceeding to the next step. Carefully select this setting that cannot change without re-installing.
- Be attention!
- In this step, you can configure Zedge tonesync manually every time you sign in.
- When it completes, the main Zedge tonesync Window will appear. You are now ready to configure it.
Read more: Install Wattpad
Method #3 Windows 8.1
Installing Zedge tonesync on windows 8.1 can quickly use the built-in. You can access Zedge tonesync via LAN, WLAN, or VPN outside your home network. However, you can set up any computer as Zedge tonesync by installing third-party applications such as the installer.
- This step-by-step guide shows you how to download and install on Windows 8.1 without installing third-party software or tools. I set up a Windows Zedge tonesync on Windows 8.1.
- Files and folders share easily through an internal or external network via any built-in option.
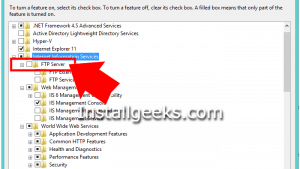
- Windows 8 and Windows 8.1 come with built-in Internet Information Service features to install before use.
Method #4 Windows 10
To place the Zedge tonesync in Windows 10.
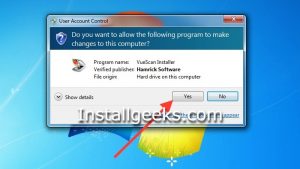
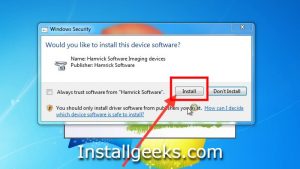
Now double-click the install icon to install the Zedge tonesync. It will start installing it. It will also ask for system permissions to allow the installer which will ask for Yes or Not to install Zedge tonesync in windows 10.

- Click the Yes button to start the installation. Shows Wizard was requesting acceptance of the License Agreement.
- Click the button and agree to accept the License Agreement. It will load the needed data and show the installation options.
- Select the appropriate option to allow all users or active users and click the following button. The next wizard provides options for selecting input items.
- It is mandatory to install the Zedge tonesync. You can keep some items selected or unselected according to your needs. After selecting input items, click the next Button to install the installation. The following wizard offers the option to choose the installation method and Start Menu options.
- Now click the Next Button to proceed with the installation. Completes the installation and displays the final wizard with a success message.
- Now click the End button to stop the installer. It will also use Zedge tonesync if you can keep the Zedge tonesync on the start option currently selected. Default screen.
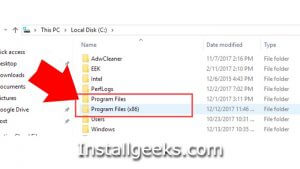
- See your installed software in a location: C:/Program Files
Method #5 On Windows 11
Firstly, you must download Zedge tonesync on your PC and install it on your computer. Once complete and you open the software, you will see that it is empty. The editor relies heavily on the packages you will need to install.
Another primary downside of Zedge tonesync is the process of finding all the packages that need to be installed. When you have finished repairing the large screen, you should be as accurate as you want.
You can use JSOspN files to change anything you like on the user interface. The installation setup of Windows 11 asks that do you want to install or not so Click on Yes and run the installation file.
Read more: Install YouTube
Window 11 Guidelines
You can download Zedge tonesync from its official site. To install it in Windows 11, go through the following steps:
Step 2: Select the location you want and click the following button to run it.
Step 3: If you want Zedge tonesync in your right-click menu, check the checkbox and click the options button.
Step 4: Press the install button
Step 5: Finish with the installation process.
Method #6 Install on Mac
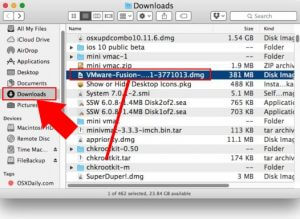
Downloading Zedge tonesync software on Mac is very simple and can be completed in a few steps.
- First, download the appropriate package for your processor.
- Then double-click on the downloaded .exe file, and it will release automatically.
- To start the software, double-click the bulk of the downloaded app.
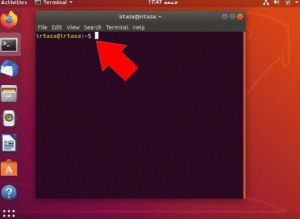
Method #7 on Linux
Creating any file or folder is too difficult for Linux which is why there are going to install Zedge tonesync for free and accessible. You can use the command-line interface (end) faster than those who are more skilled at typing commands. They do not allow new users because anything can always go wrong.
In this selection area, you can make sure you selected a file for running. On the right, a Window displays your location at the same place. You need to make sure you click on the folders in the appropriate window.
- Now, go to the place where you want to place software files (maybe default!).
- After that, it is about to be done.
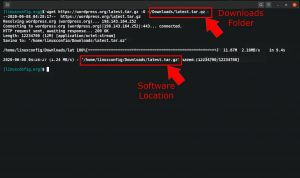
You need to use it, and that’s about it.
Method #8 Install on Ubuntu
To install Zedge tonesync in Ubuntu, connect to the Internet and launch Ubuntu from the left menu bar. In Ubuntu, click the Search icon located at the top right of the window. In the search box, search for the name Zedge tonesync.
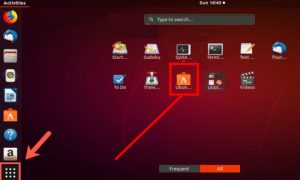
 From the search results, click on the result representing that.
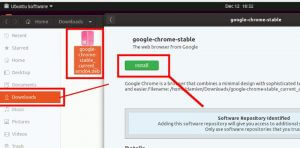
- Clicking on a search result shows detailed information about that result in a new window.
- This window contains an installation button that allows us to install the software.
- Click the install button to install it.
All done! you got all kinds of information you were looking for!
Read more: Install TikTok
")
")
")