
You don’t need to be super-techie to install a hard drive on your computer. This is actually one of the easiest upgrades available for your computers. If you need help with hard drive installation, click here or follow the guide below:
Replacing a Hard Drive
If your existing hard drive is damaged, full, or isn’t viable anymore for whatever reason, you’ll need to replace it with a new one.
- Back up data: If you’re lucky and you have time to back up all the files you’ve created and collected on your computer before the hard drive fails, good for you. If you still haven’t backed up your data, do it now. You have several options from bringing the files to the cloud, moving your data to an external hard drive, or copying your files to a flash drive.
- Uninstall the old hard drive. Turn off your computer, disconnect the hard drive, then physically remove it. How you unscrew or slide the hard drive depends largely on the type of computer or hard drive you have. In most cases, you simply need to slide the drive out from the bay after removing the power cables.
* A note on removing your old hard drive: The procedure below will slightly differ based on the drive cages, bays and mounting options available on your computer. Their position and orientation may also differ between computer models. Drive cages are often mounted to the case and because they have screws to keep the hard drive steady and in place, you’d have to unscrew first to access the drive.
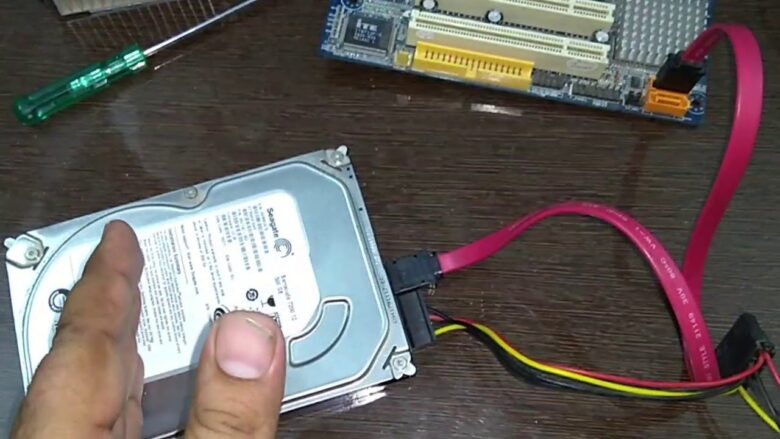
- Install the new hard drive. If you were able to remove an old hard drive, just reverse the steps on how you did it to install the new one. Make sure to reconnect the data cables and into the power supply unit (PSU). Your entire computer wouldn’t turn on if you missed this step.
Source: youtube.com
To do this, get one end of the SATA cable and connect it to your hard drive, then the other end to an available SATA port on your motherboard. Sometimes, the SATA cable would be L-shaped or have straight ends – this shouldn’t matter as long as you connect them properly. What would matter though is if yours have metal retention clips, which you should remember to put back since these help keep the SATA connectors secured.
Note that when you need to physically mount the hard drive, you have to ensure that the drive doesn’t move. There’s a reason why it is caged or placed in a secured location.
- Format the new hard drive. You can’t just start your computer and immediately save files on the new hard drive. You have to format it first. The process will be different for a MAC and PC:
- MAC Formatting: To format a MAC, open “Disk Utility” and select the drive you wish to format from a list. Choose the “Erase” tab and pick the format type you want to use. Give the drive a name (it can be whatever you want as long as the characters fit the allowed number). Click “erase,” which will delete the files and change the format of your new hard drive.
- PC Formatting: Go to the menu and search for “disk management” utility. Open and click “Create and format hard disk partitions.” From inside the disk management popup, select the drive you want to format from the list. Right-click on the drive, then choose “Format…”. On the “volume label” space, enter a name for your new hard drive. You should then select a format type on the “file system” dropdown. Tick off “perform a quick format,” then click OK. This will delete all files and change the format of your new hard drive.
Installing a Hard Drive on your laptop
If you have a laptop, installing a hard drive on your device follows a different procedure. But before you do, here are several reminders:
- Make sure your laptop accommodates a change in hard drive. Some laptops cannot be opened, or if you’re planning on adding a hard drive, you might find out that your laptop does not have an expansion slot (most laptops are designed this way).
- You need to buy a new hard drive that is compatible with your laptop (lookout for the right type such as HDD vs SSD and the size of drive ideal for your laptop model).
- Before you touch the cables and other components inside your laptop, ground yourself (or touch something metal or wear a static wrist band) to prevent accidentally damaging your laptop’s parts with static electricity.
- Backup your files and information saved on your old hard drive.
Source: macrumors.com
Assuming you’ve bought the right hard drive and have backed up your files, you can begin by turning off your laptop. Turn your laptop over and remove the bottom panel with a screwdriver. Some laptops may require you to unscrew some screws to do this. Once you can access the parts, remove the battery. If your laptop has glued your battery shut, don’t pull it forcefully as it could shock you.
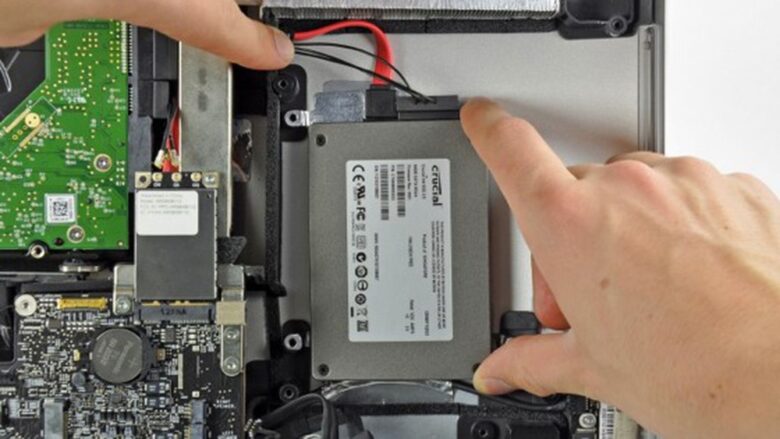
Check if your laptop has a special panel for the hard drive. If so, open this with Phillip’s head screwdriver and unscrew the screws that hold your hard drive in place. Remove the old hard drive by disconnecting the cables/wires, releasing a ribbon/latch, and sliding it out of its housing.
Now that you have space for your new hard drive, reverse the procedure and place the new hard disk into the vacant enclosure. Connect the cables/wires and secure the panel with screws. Close your laptop’s bottom panel and turn your laptop facing the right side up.
To use your laptop with the new hard drive, you have to install an operating system (people often pick between Mac OS and MS-Windows, but there are other OS options available).
If you follow these steps, the drive should be available for use. For those who split their new hard drive into multiple partitions, you’ll be able to see all of these partitions (each with its own drive letter) when you check them on File Explorer.


